Redemption in Stripes
Failure does not sit well with me, especially when it comes to things I make with my hands. I like to think I'm a pretty easy going person, but when something I make doesn't work out, I can't stop thinking about it until I find some way to get it right. It's not my greatest quality, in my opinion, but some people would call it tenacity.
I would call it obsession. Nevertheless...
I've been stalled with my knitting since I ran out of yarn for my Bottoms Up top, so I've been keeping myself busy with other projects. I thought I'd get out some of my fabric and practice some of my sewing skills, which resulted in failed skirt project which I briefly mentioned here (I don't even wanna talk about it, it irritates me so much).
And then, I found this fabric on sale at the local fabric store. The left is a jersey knit fabric that was on sale for 70% off. I think I paid $10 for two metres (nearly two yards) of it. The right one was on sale for $2.00 per metre. I also got two metres of it, which was a great deal for $4.00. I was attracted to the bold green stripe in the pattern and thought immediately that it would make a natural "belt" for a dress.

I've been thinking a lot about stripes recently, and how they can be flattering if placed correctly. I even went so far as to research the best way to place stripes, and basically, you should place the boldest stripe in a place you want to feature: either the narrowest part of your torso, or across the chest... or both, if you have different colours and different stripe widths.
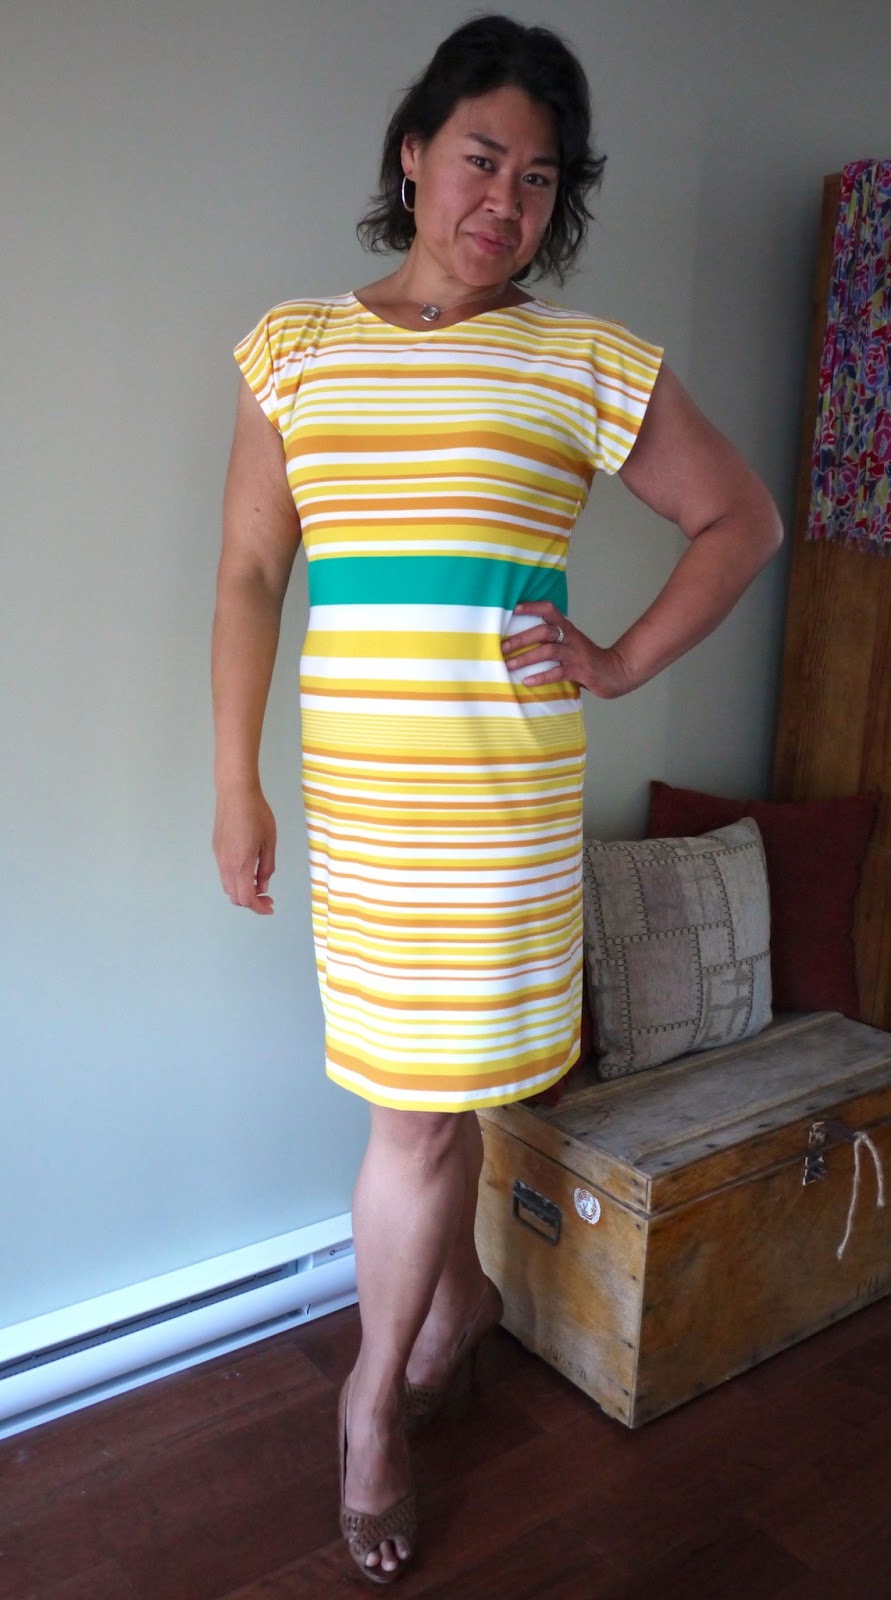
And so, I kept that in mind as I used this pattern to make this dress:

I mostly followed the instructions, except that the original pattern uses one piece of fabric, whereas I cut my fabric into two pieces so that I could have the stripes hit me in the same places on both the front and the back. Note that the green stripe is placed at the narrowest part of my torso, while one of the orange stripes is placed across my chest. This gives me a few more curves to an otherwise straight figure.

I also didn't pin it against my body, because that's nearly impossible for me to do by myself (and it's also a good way to make yourself into a voodoo doll), so I used another dress of a similar shape and just pinned it on top of my fabric and cut out a similar shape. I also sloped the shoulders a bit more, because when I tried it on the first time, I thought it looked a bit too much like Britney's stewardess uniform in her Toxic video. Yeah... no. Less Britney, more Mad Men, please.

Sewing failure: redeemed. Yes!
I'd like to say it was easy peasy, but it took a few tries and a bit of seam-ripping and cutting to get the shape right. It was a one-afternoon project, though, and I'm quite pleased with the result. I'm especially impressed with how I managed to match the stripes as well as I did. I'm sure a real seamstress would have done it better, but for moi, it works. The fabric is forgiving enough to hang nicely no matter which way I stand. It's also quite amazing how well a zigzag stitch works with this fabric.
I say that like I'm a sewing expert, but I'm really just in obsession-mode. Don't mind me.
Luckily, my sewing obsession has been temporarily broken by the arrival of the skein of yarn that will allow me to finish my top. I'm thinking it'll probably be done by tomorrow evening, if I sit down and work on it.
And now back to our regularly-scheduled obsession...

I would call it obsession. Nevertheless...
I've been stalled with my knitting since I ran out of yarn for my Bottoms Up top, so I've been keeping myself busy with other projects. I thought I'd get out some of my fabric and practice some of my sewing skills, which resulted in failed skirt project which I briefly mentioned here (I don't even wanna talk about it, it irritates me so much).
And then, I found this fabric on sale at the local fabric store. The left is a jersey knit fabric that was on sale for 70% off. I think I paid $10 for two metres (nearly two yards) of it. The right one was on sale for $2.00 per metre. I also got two metres of it, which was a great deal for $4.00. I was attracted to the bold green stripe in the pattern and thought immediately that it would make a natural "belt" for a dress.

I've been thinking a lot about stripes recently, and how they can be flattering if placed correctly. I even went so far as to research the best way to place stripes, and basically, you should place the boldest stripe in a place you want to feature: either the narrowest part of your torso, or across the chest... or both, if you have different colours and different stripe widths.
And so, I kept that in mind as I used this pattern to make this dress:
I mostly followed the instructions, except that the original pattern uses one piece of fabric, whereas I cut my fabric into two pieces so that I could have the stripes hit me in the same places on both the front and the back. Note that the green stripe is placed at the narrowest part of my torso, while one of the orange stripes is placed across my chest. This gives me a few more curves to an otherwise straight figure.

I also didn't pin it against my body, because that's nearly impossible for me to do by myself (and it's also a good way to make yourself into a voodoo doll), so I used another dress of a similar shape and just pinned it on top of my fabric and cut out a similar shape. I also sloped the shoulders a bit more, because when I tried it on the first time, I thought it looked a bit too much like Britney's stewardess uniform in her Toxic video. Yeah... no. Less Britney, more Mad Men, please.

Sewing failure: redeemed. Yes!
I'd like to say it was easy peasy, but it took a few tries and a bit of seam-ripping and cutting to get the shape right. It was a one-afternoon project, though, and I'm quite pleased with the result. I'm especially impressed with how I managed to match the stripes as well as I did. I'm sure a real seamstress would have done it better, but for moi, it works. The fabric is forgiving enough to hang nicely no matter which way I stand. It's also quite amazing how well a zigzag stitch works with this fabric.
I say that like I'm a sewing expert, but I'm really just in obsession-mode. Don't mind me.
Luckily, my sewing obsession has been temporarily broken by the arrival of the skein of yarn that will allow me to finish my top. I'm thinking it'll probably be done by tomorrow evening, if I sit down and work on it.
And now back to our regularly-scheduled obsession...

Comments